


caprese focaccia bread
and a "state of the farm" update


As we barrel into the second half of 2024, I figured it’s a good time for a state of the union / state of the farm update, with a behind the scenes look at what’s going on – the good, the bad, and the ugly – in each section of the farm (we call them quadrants).
There’s a lot to cover, so let’s get into it… here’s a detailed look at the farm as of July 5th, 2024:
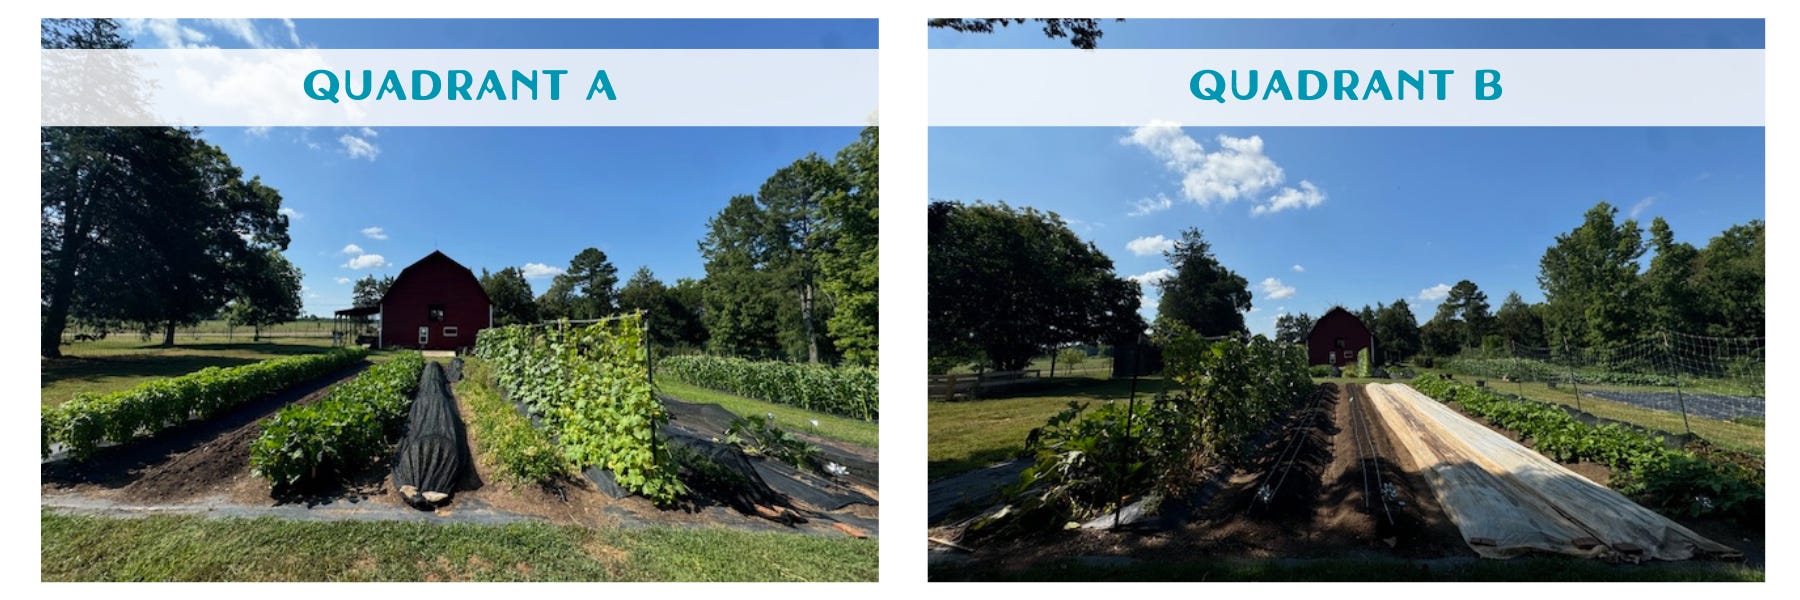
Quadrant A – This quadrant is definitely in transition. There are a few summer crops that are thriving and getting harvested daily (basil, green beans, and cucumbers), alongside some zucchini that is pretty much wrapped up for the season, as well as several rows of experimental summer greens (lettuce and arugula) that should be ready to harvest in a few weeks. In the heat of the summer, I cover all our summer greens with shade cloth to keep them from becoming bitter in the hot weather. Thankfully, we’ve kept up with the weeds over here, so we’re in pretty good shape on that front. Next month, we will be planting lots of fall greens and root crops in this quadrant.
Quadrant B – Another quadrant in transition away from early summer and over to our late summer / fall crops. Gone is the early succession of zucchini, and we’re about to pull out our first succession of cucumbers (which did amazing, btw). In the middle rows where we had potatoes growing for most of the spring, we just planted a late succession of corn and our first round of fall carrots (both crops should be ready in September). The last two rows of this quadrant are beans – bush beans (my go-to variety is Provider) and some funky long beans that will climb a tall trellis, called Red Noodle. This quadrant has also stayed well-weeded so far this season, which I’m very grateful for. The main bummer is that we’ve had a lot of vole activity over here, and they’ve been causing a ruckus digging tunnels through our beds.

Quadrant C – As you can see, there’s not much going on here! We scaled back our growing a bit this season (I didn’t want to tackle too much this year, knowing we’d have a newborn and a rowdy toddler), so this quadrant has mostly stayed covered with a tarp. Last year the weeds got MAJORLY out of control in this quadrant, so I’m hopeful that the extra time under a tarp will help with weed suppression in future growing seasons. We did open up the last two rows in this quadrant for okra, which is finally hitting its stride. Okra is a wild crop, and the harvests have been exponentially increasing with every passing week as the plants get bigger… by September, they will be 10 feet tall!
Quadrant D – This quadrant is mostly dedicated to crops that need a bit more space, and it’s where all of our winter squash (butternut, acorn, delicata, etc) are growing. I’ve always struggled with winter squash here in North Carolina, as the pests and powdery mildew always take them out, and honestly I almost didn’t plant any this season. But I figured I’d throw some seeds in the ground and see what happened, and (KNOCK ON WOOD) so far, this is the BEST winter squash crop I’ve ever had. (I love how the one year when I completely ignore the winter squash, it decides to freaking THRIVE. Mother nature is hilarious.) We also have several rows of corn in this quadrant, and I’m counting down the days until I can tear a ripe ear off the stalk and eat it right in the field, each kernel bursting with sweetness and warm from the heat of the sun.

Berry Patch – It’s the juiciest time of year over in the berry patch! Our blueberries and blackberries are at their absolute PEAK, and it’s actually a bit overwhelming how many berries need to be picked every day (especially the blackberries). We definitely lose some fruit to hungry birds/insects, but we have so many that I don’t really mind sharing. Anyone who visits our farm in late June / early July can expect to be sent home with a few quarts of ripe berries, and so far, no one has complained. ;)
Perennial Garden – She’s wild, she’s weedy, she’s wonderful. Especially if you are looking at it from afar, this space looks pretty awesome and full of color –though as soon as you get close, you’ll see there are a LOT of weeds in the mix. And while I’m usually very on top of weeds, this is the one area where I try to *let go* a bit, and it’s been freeing to embrace the chaos and to see how ALIVE this space is, literally buzzing with every kind of pollinator. Weeds or not, this has been a lovely space to enjoy this season, and every farm to table workshop I teach ends with a family style meal together at the picnic tables in the center of the garden.

Tunnel #1 – Even though it can feel extra hot inside these tunnels during the day, they’re still my favorite spot on the farm right now. I’m happy (and relieved!) to report that both tunnels are doing super well, which is good because they’re filled with some of our most beloved (and high-value) summer crops – tomatoes, peppers, and eggplant. In this first tunnel, we have several varieties of peppers (from bell peppers to shishitos to hot peppers), our Globe and Asian eggplant, and half a row of tomatoes. All of these crops were planted in mid-April, and we’ve been busy tending, pruning, and trellising them for months. Our eggplant and some of the peppers are already getting harvested, though our big bell peppers still have several weeks before they’re ready. Thanks to the landscape fabric that we use with these crops, there are blissfully few weeds to contend with over here.
Tunnel #2 – Everyone’s favorite tunnel! This is Tomato Central and it’s currently bursting with a rainbow of ripe cherry, heirloom, slicer, and paste/roma tomatoes. I love tomatoes, but dang, they stress me out. They’re pretty high maintenance with the constant need for pruning and trellising, but all the hard work is finally paying off and (so far!) we’re having a beautiful tomato season. The last row of this tunnel has some fun crops – mini fairytale eggplant and habanada peppers (flavor of a habanero, but without the heat). And once again, very little weeding in here thanks to the miracle that is landscape fabric.
And there you have it, a look at the farm in peak summer! If you have any specific questions about our growing practices or need some help in your garden, just let me know in the comments. :)
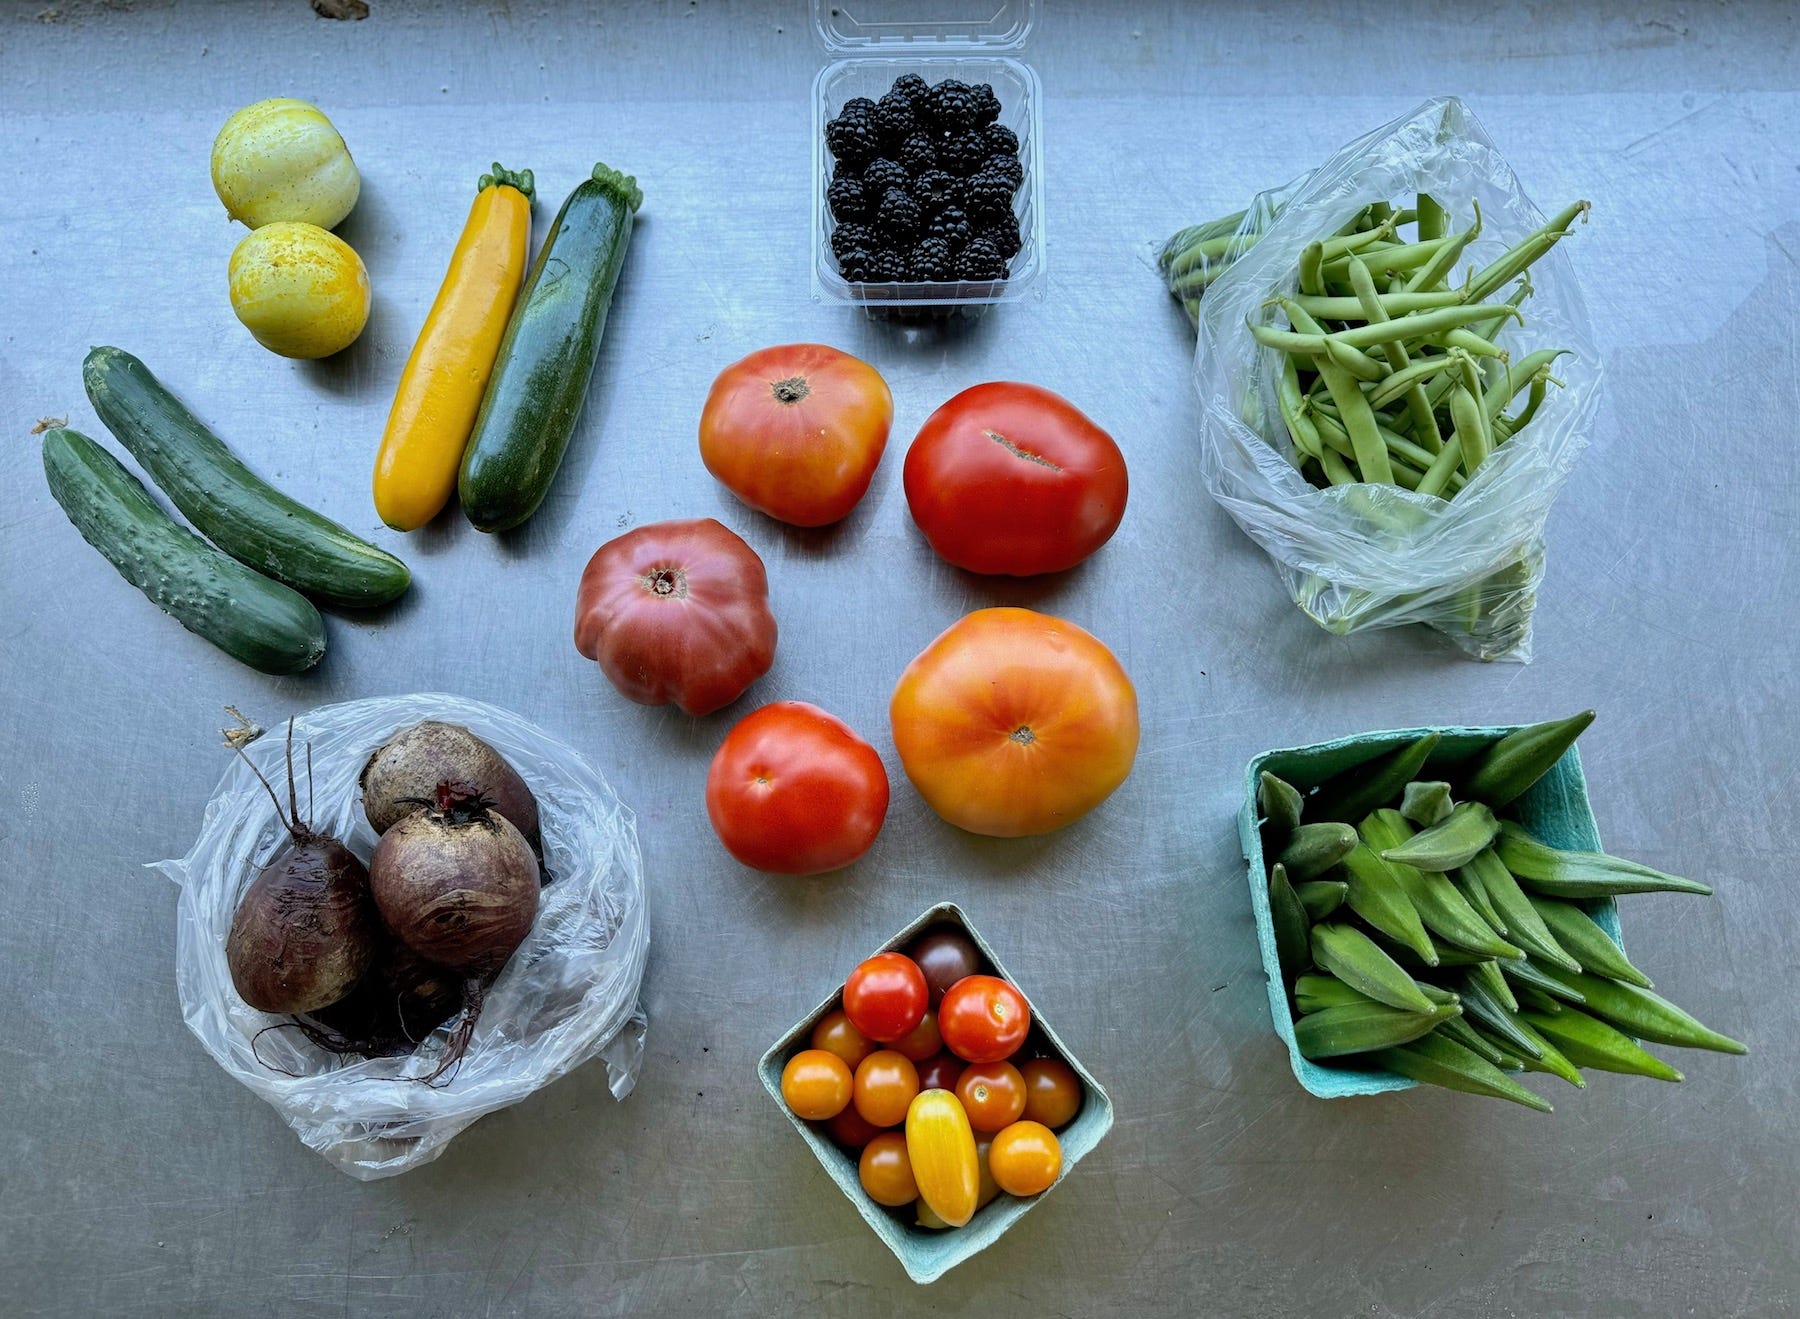
And finally, here’s a snapshot of what most of our CSA members received in their boxes for this 5th week of our Summer CSA: blackberries, green beans, okra, zucchini, cucumbers, beet roots, cherry tomatoes, and the first of the heirloom + slicer tomatoes.
Need some culinary inspiration for the weekend? Here’s my weekly round up of seasonal recipes from around Substack (and my ever-growing recipe index) to help you eat like a farmer:

Roasted Tomato & Basil Soup by yours truly :)
Summer Squash Pizza with Garlic Confit, Basil & Burrata by
/- /
Keep reading for my new recipe this week, caprese focaccia bread – it’s the first Friday of the month, which means the recipe is available to ALL subscribers this week! For full access to my recipes every week, consider joining as a paid subscriber.

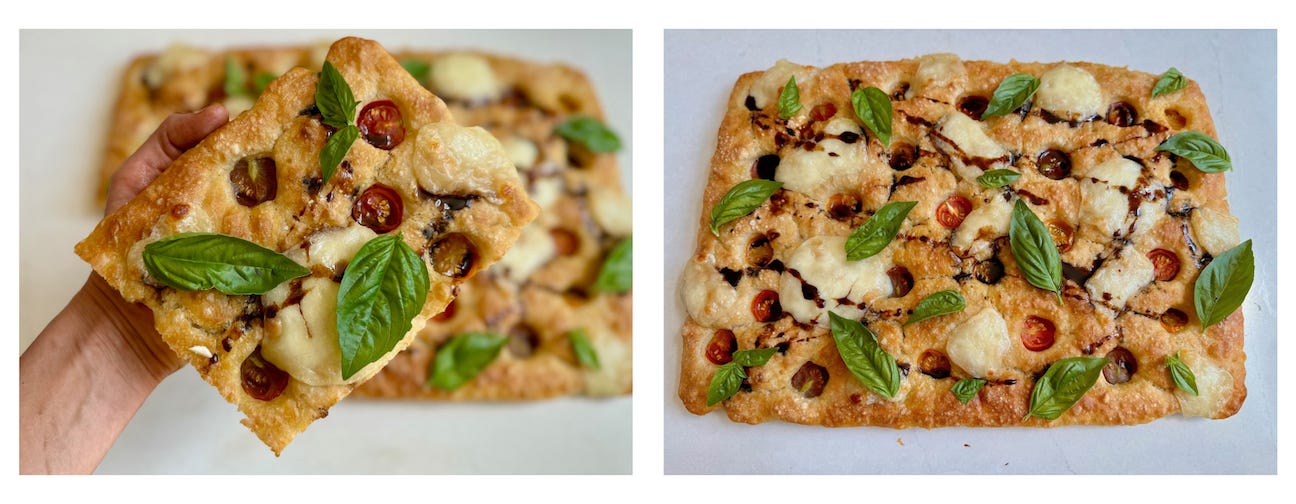
Today’s recipe is basically just me combining two already nearly perfect foods (focaccia bread and caprese salad), all to create an impossibly MORE perfect and fabulous thing.
Because why not put the ingredients of a classic caprese (ripe summer tomatoes, fresh basil, mozzarella cheese, balsamic glaze) atop a warm, crusty on the outside, pillowy on the inside, golden slab of focaccia bread?
For a more detailed, photo-filled guide on what to look for when making focaccia, head over to my original focaccia recipe. And if you’re thinking that making homemade bread is too complicated, please give this one a try. Focaccia is super user-friendly (no kneading required) – though it is helpful to know what to look for when it comes to allowing the dough to rise (ie proofing), which is why I’ve included helpful photos in my original original recipe.
This caprese focaccia situation is just the thing for a long, hot, holiday weekend… all I ask is that if you make it, send pics!
Keep reading for today’s recipe, along with a 1-page PDF for easy printing.
PS – It’s the first Friday of the month, which means *everyone* gets access today’s recipe. If you enjoy this newsletter and want to receive a new hyper-seasonal recipe every week, consider becoming a paid subscriber! Paid subscribers also get access to my (ever-growing) full recipe archive, handy gardening guides, bonus content and you’ll get to join our private community chats.

Caprese Focaccia Bread
INGREDIENTS
For the focaccia
6 1/4 cups all purpose flour (750 grams)
2 tablespoons kosher salt
1 teaspoon instant yeast (I like to use Fleishman’s brand)
3 1/2 cups warm water (100F - 120F)
1/4 cup extra-virgin olive oil, plus more for greasing and drizzling
Flaky sea salt
1 cup cherry tomatoes, halved
1 cup (4 ounces) mozzarella ball, sliced or torn (use a mozzarella ball like this)
Handful fresh basil leaves
For the balsamic glaze
1 cup balsamic vinegar
PREPARATION
In a large bowl, whisk together 6 ¼ cups (750 grams) flour, 2 tablespoons kosher salt, and 1 teaspoon instant yeast. Add 3 ½ cups warm water (the ideal temp is around 100F-120F) to the flour mixture and stir briskly for one minute with a sturdy wooden spoon until all the flour is incorporated, and a wet, sticky dough forms – it should be the consistency of a wet porridge.
Pour ¼ cup olive oil into a second large bowl. Transfer the focaccia dough to the bowl, then use your hands to scoop oil from the sides over the top of the dough, and cover the bowl tightly with plastic wrap. Place the bowl on the counter in a warm spot and let the dough rise until it has doubled in size and is nice and bubbly. This usually takes 1-2 hours, but will depend on the environment in your kitchen.
While the dough is rising, make your balsamic glaze – pour 1 cup balsamic vinegar into a small saucepan. Bring to a boil, then reduce the heat to low and gently simmer until reduced by half, 10-15 minutes, stirring occasionally. When the glaze has reduced by half and lightly coats the back of a spoon, remove from the heat and set aside to cool (the glaze will thicken as it cools).
Line a 18 x 13-inch rimmed baking sheet with parchment and drizzle the parchment with a few glugs of olive oil. When the dough in the bowl has doubled in size, gently pour it onto the parchment-lined baking sheet, using your hands to spread the dough out on the sheet.
Place the baking sheet in a warm place and let it rise until it about doubles in bulk. Again, the rising time will vary – usually this second rise takes another 1-2 hours in my kitchen. When the dough is ready, it should have a fluffy feeling with lots of bubbles on the surface.
About 30 minutes before you're ready to bake, preheat your oven to 450° F.
After the dough is finished rising in the baking sheet, use your fingertips to make indentations in the dough (you'll feel like you're playing the piano). Dimple the entire dough and then drizzle the top of the dough with olive oil. Sprinkle evenly with flaky sea salt. Finally, place the halved cherry tomatoes over the dough, cut side facing up.
Bake for 15 minutes, then open the oven and rotate the pan to ensure even baking. Bake for another 10 minutes, then remove the baking sheet from the oven and quickly spread 1 cup sliced/torn mozzarella ball over the focaccia, then return to the oven for another 5-7 minutes, until the cheese is melted and the dough is golden brown on top.
Transfer the focaccia to a wire rack to cool. To serve, top with a handful of fresh basil leaves and a generous drizzle of the balsamic glaze. Enjoy!
That’s all for this week! If you enjoyed this newsletter, it means the world if you tap that “heart” button below, share this with a friend, subscribe, or leave a comment (it really helps more people find this newsletter)! Thank you so much for your support!
I absolutely loved reading your recap of what’s happening in your gardens. I am not a gardener, but I love fresh fruits & vegetables…..thank you for sharing your trials & tribulations… your highs & lows!!
Your farm sounds wonderful!!