


kale caesar salad with crispy chickpeas
a farm-fresh spin on a classic


Well, compared to the sh!t show that went down last week, this week has been a freakin breeze!
We had a great crew here on Tuesday working on tons of bed prep, along with planting 2 rows of onions and some lettuce. We held off on planting the majority of our spring seedlings (which all arrived last week) because we had some strong thunderstorms moving through and I didn’t want all the plant babies to get battered right after getting planted.
This may be a weird analogy, but I think of transplanting seedlings a bit like an organ transplant. Especially in those first few hours/days after transplanting, you want to do everything possible to create the ideal environment for the transplants to “take” and thrive. So when it comes to transplanting baby seedlings, you definitely want to check the weather forecast and make sure the conditions aren’t too intense (ie too cold, too hot, heavy rain, etc) in the days immediately following.

There’s been a LOT of bed preparation this week, and I’m especially grateful for our tilther (not a tiller), which we use as the final step in our bed prep. (PS – I just shared a super detailed post about exactly how we turned a grassy field into a market garden and how we prep our beds, check it out here).
The tilther is a gentle tilling tool that mixes and blends the top 2” of soil, which helps incorporate compost and other amendments into the native soil, and it creates a beautiful, smooth bed for planting. I love the tilther because – unlike large rototillers –it just works the top few inches of the soil and therefore causes minimal disruption to the vital biologic/microbial activity underground. But at $675 a pop, these babies aren’t cheap, and might not make sense for most home gardeners.
So if you don’t have access to a tilther, I recommend using a metal rake, like this one, as a final bed prep step to blend everything together and create a nice smooth bed. Or if your space is on the smaller side, you can just use your hands to break up any clods and to mix the compost + amendments into the native soil).

Also! ICYMI, earlier this week I shared my Spring Vegetable Garden Guide, which is a treasure trove of information digging into ALL the nitty gritty details for a growing bountiful spring veggie garden this year.
This Spring Vegetable Garden Guide will teach you:
Which crops are best to plant in the spring (and whether they should be direct seeded or transplanted)
When to plant each crop (based on the last frost date in your area)
Ideal spacing for each plant (with some new handy photo guides and pro tips)
For larger growers who use a Jang seeder, I include my specific Jang seeding calibrations for each crop (ie which roller I use and the sprocket spacing)
My favorite varieties for each crop (including links to purchase seeds for the specific varieties... not sponsored!)
Additional pro tips that I’ve gained from over a decade of gardening and farming
PS – I’m offering a 20% discount on all annual paid subscriptions this week. I very rarely have discounts (like maybe 2-3 times a year) so if you’ve been on the fence about upgrading, now is the time! To redeem, upgrade to be a paid annual subscriber by midnight on Sunday, March 9th.
Keep reading for this week’s new recipe, kale caesar salad with crispy chickpeas. It’s the first Friday of the month, which means the recipe is available to ALL subscribers!

Call me #basic, but I freaking love a caesar salad. Something about the crisp greens, crunchy croutons, generous heap of parmesan cheese, and that salty / creamy / umami-rich dressing… it’s a classic for a reason.
But make my own caesar from scratch at home? Umm, no thanks. Even though I’ve gone to culinary school and I teach cooking classes for a living, for some reason making a homemade caesar salad felt… too complicated?
But this week, I was inexplicably craving a really good caesar, so I forged ahead and set out to create the *perfect* caesar salad… with a farm-fresh spin, obvi. And wouldn’t you know, it was absolutely NOT complicated and I will absolutely be making this salad on repeat from here on out.
For this recipe, I swap out the typical romaine lettuce for hearty bunches of kale, and instead of bready croutons, we’ve got crispy spiced chickpeas. (You can of course ignore these swaps and make a classic caesar with romaine and regular croutons, but don’t you dare change a thing about this homemade caesar dressing! It’s perfect, IMHO.)
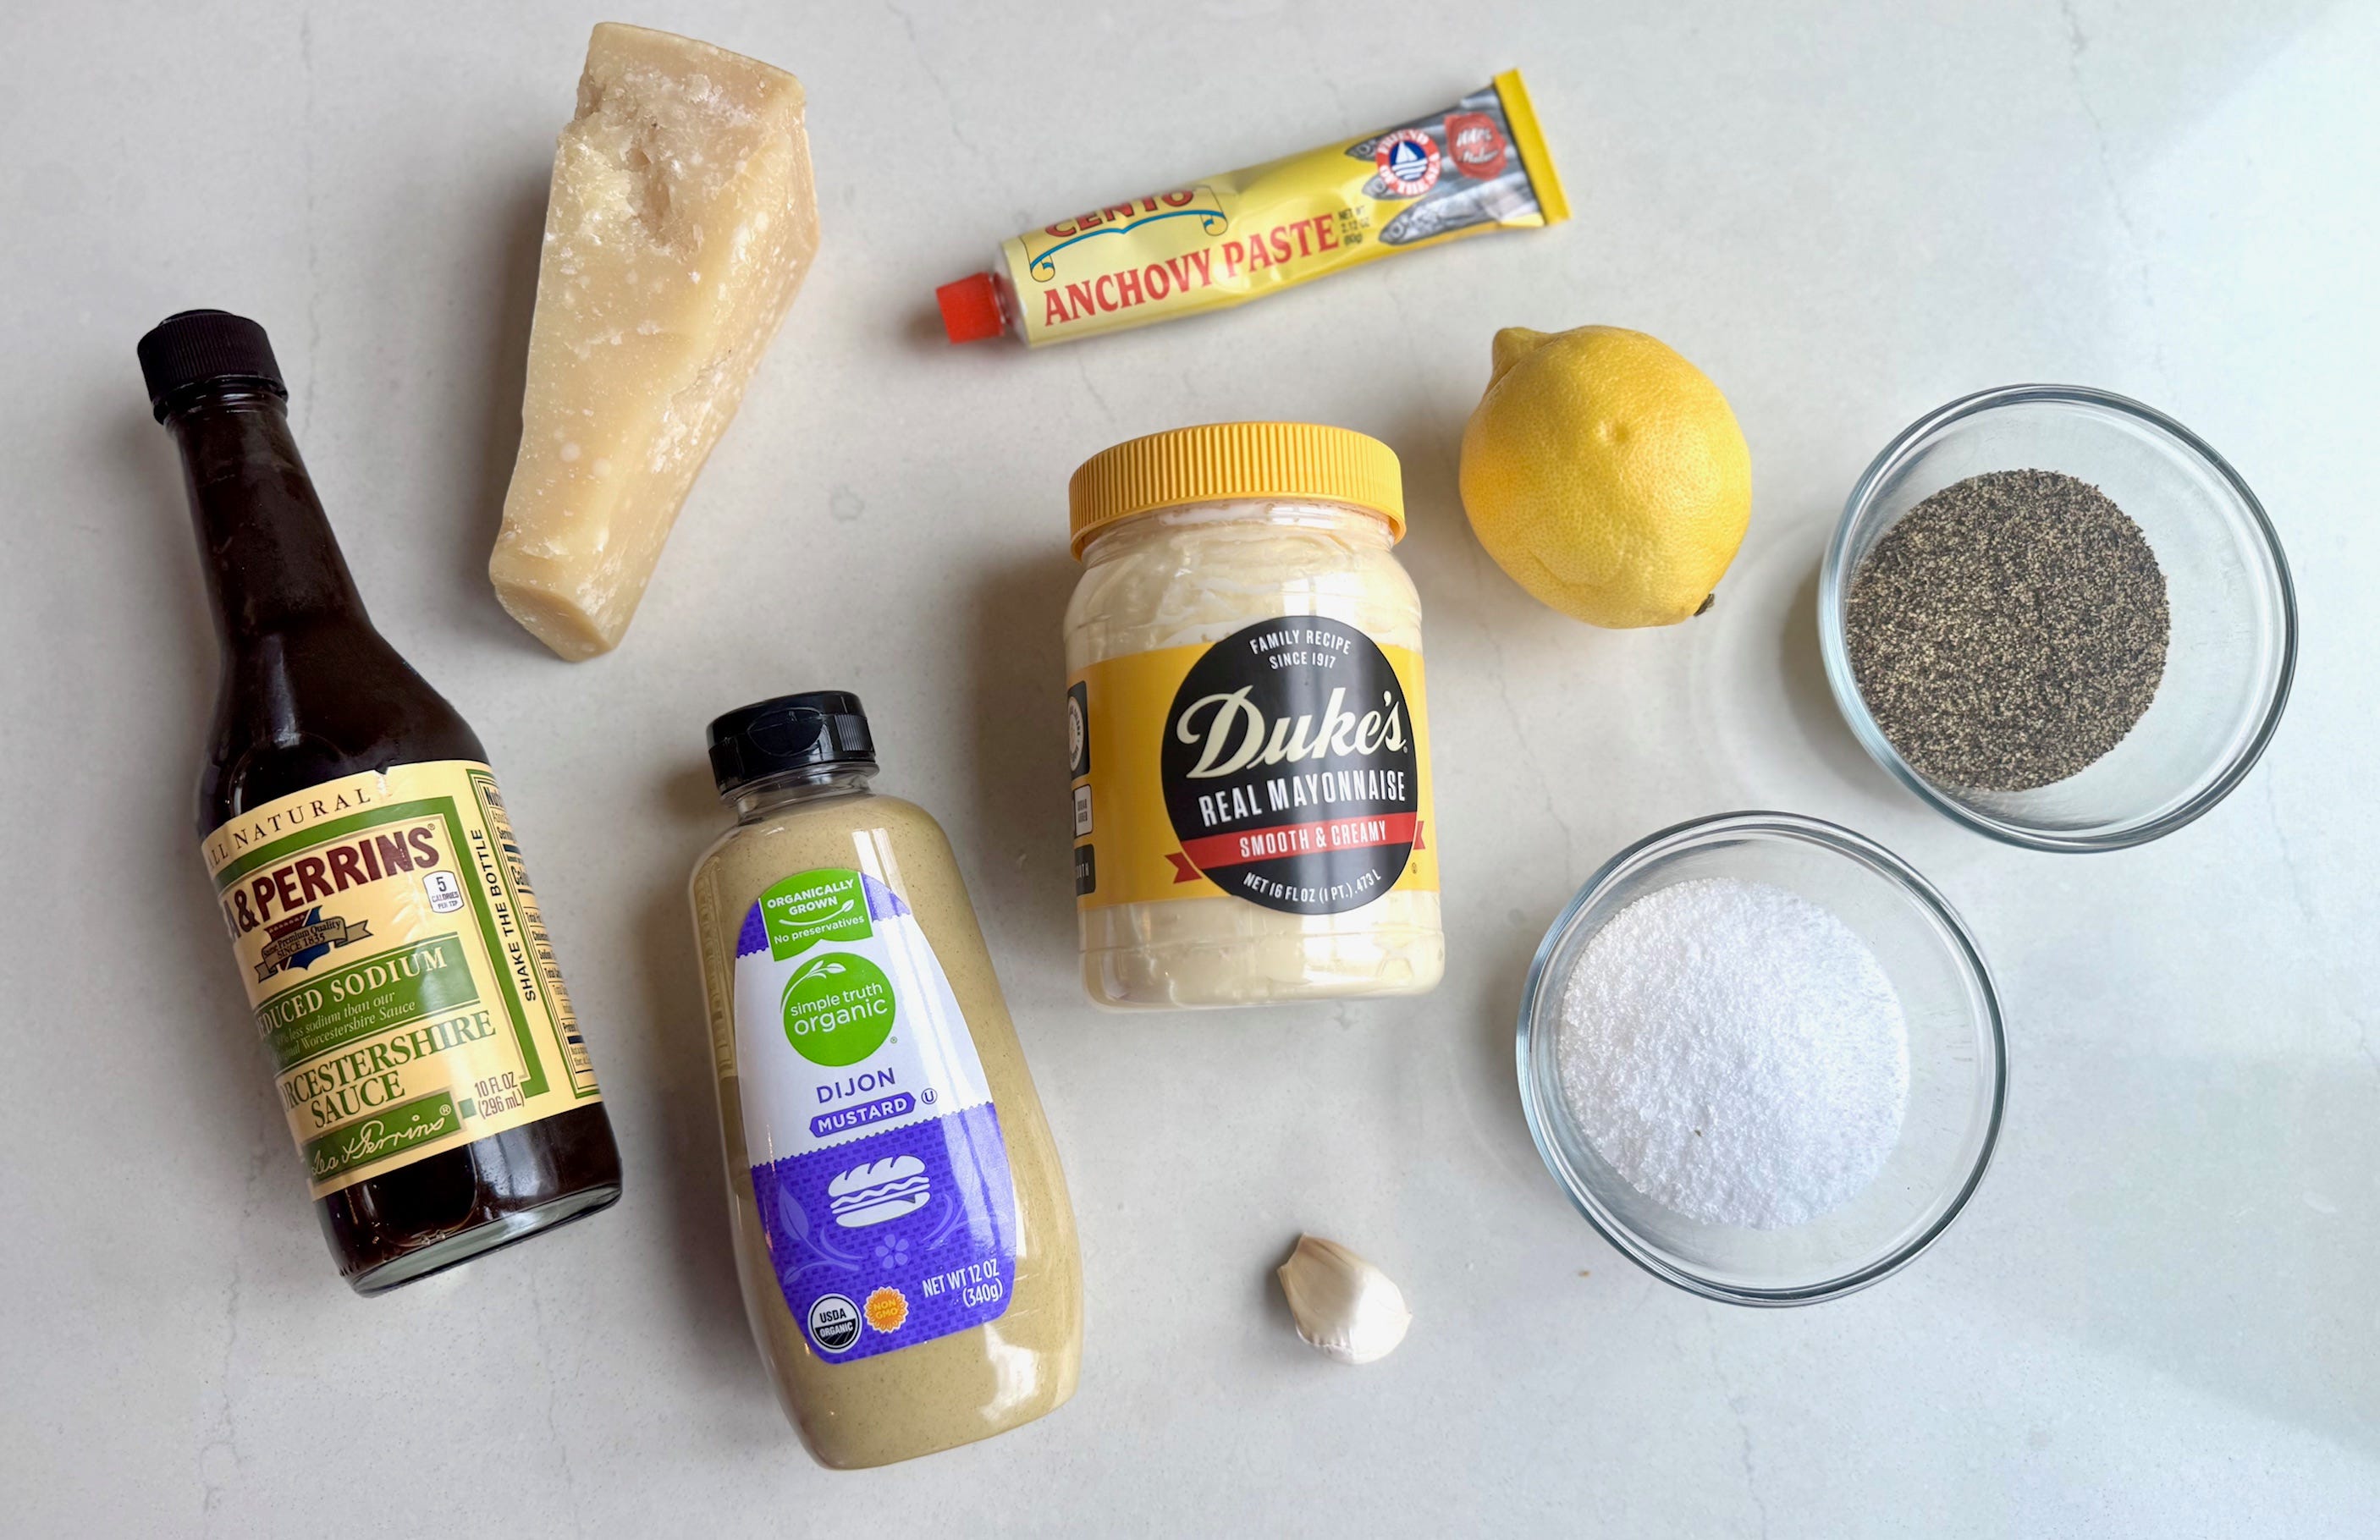
Speaking of the dressing… as someone who isn’t a big fan of anchovies (gasp!), I was new to the world of anchovy paste, but now I’m a total convert. Anchovy paste is basically a concentrated, spreadable anchovy situation (I realize that description sounds very gross, but trust me), and I find it way more pleasant than dealing with anchovy fillets (and you can store the rest of the paste for months in the fridge). Also! Making the dressing is as simple as stirring together all the ingredients in a bowl – no special tools, no fancy techniques. 0% complicated.
All that said, if you don’t have the desire / capacity to make your own dressing right now, then just buy a bottle! You do you! But DO make this salad!
Happy cooking,
xxoo Michelle
PS – This week *everyone* gets access today’s recipe! If you enjoy this newsletter and want to receive a new hyper-seasonal recipe every Friday, consider becoming a paid subscriber. Paid subscribers also get access to my (ever-growing) full recipe archive, handy gardening guides, video tutorials, and access to our private community Help Line.

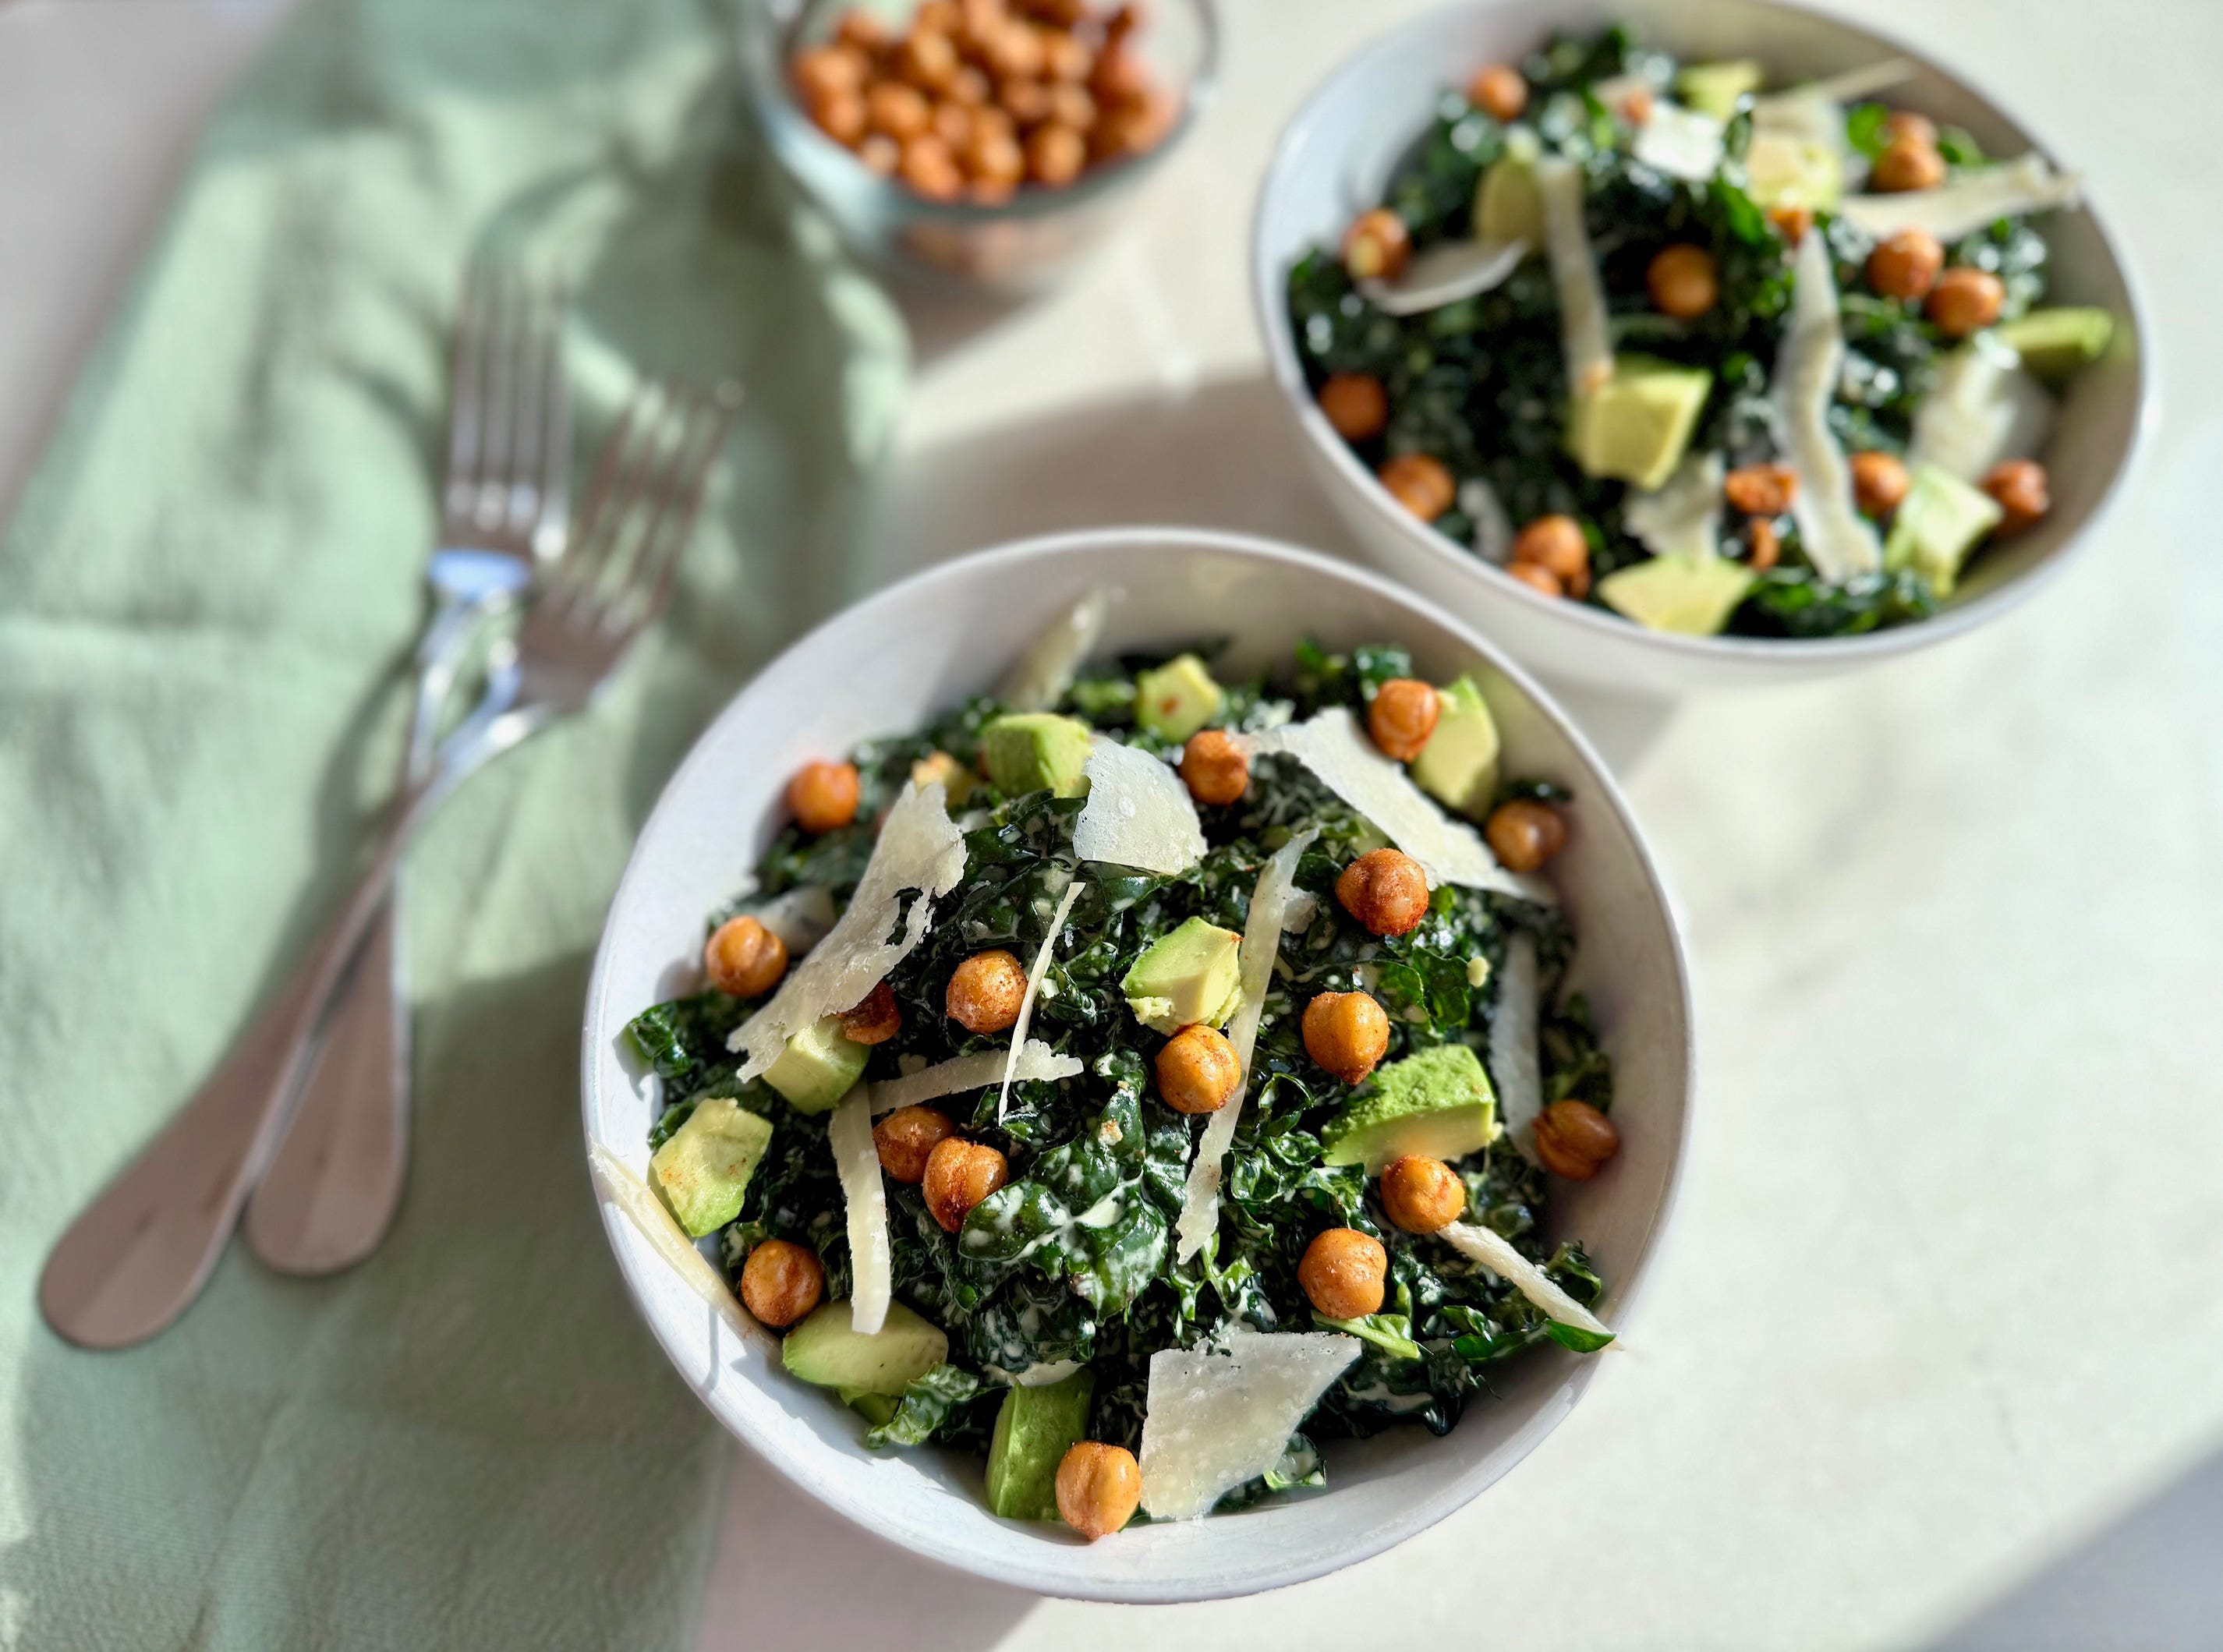
Kale Caesar Salad with Crispy Chickpeas
Serves 4
INGREDIENTS
For the salad
1 can (15 ounces) chickpeas, drained and rinsed
3 tablespoons olive oil, divided
¼ teaspoon paprika
¼ teaspoon cumin
2 large bunches of kale, kale ribs removed and leaves chopped (about 12 cups chopped)
Kosher salt
1 large (or 2 small) ripe avocado, diced
½ cup grated or thinly peeled parmesan cheese
For the caesar dressing
½ cup mayonnaise
¼ cup freshly grated parmesan cheese
2 tablespoons lemon juice
1 tablespoon dijon mustard
1 medium clove garlic, minced (about 1 teaspoon minced garlic)
1 teaspoon anchovy paste (or 2 very finely chopped anchovy fillets)
1 teaspoon Worcestershire sauce
1/4 teaspoon pepper
PREPARATION
Make the crispy chickpeas:
Preheat the oven to 400F and line a rimmed baking sheet with foil or parchment paper.
Spread 1 can drained and rinsed chickpeas on a clean towel and pat them dry. Remove any loose skins (but don’t worry about picking off all the skins). Spread the chickpeas evenly across the prepared baking sheet. Roast as-is until they’re crisp and beginning to turn golden, about 20-25 minutes, shaking the pan every 10 minutes or so to prevent burning.
Turn off the oven and leave the chickpeas as-is for 10-15 minutes, checking them once or twice to make sure they don’t burn. Remove from the oven and transfer to a large bowl. Toss the roasted chickpeas with 1 tablespoon olive oil, ¼ teaspoon cumin, ¼ teaspoon paprika, and ⅛ teaspoon kosher salt. Set aside.
Make the caesar dressing:
In a medium sized bowl, whisk together all the dressing ingredients. Taste and adjust as needed, then set aside. If using tinned anchovies, sub 1 teaspoon anchovy paste for 2 finely chopped anchovy fillets.
Make the salad:
Remove the ribs from 2 bunches of kale and finely chop the leaves (you want about 12 cups chopped leaves). Put the chopped kale in a large bowl and add the remaining 2 tablespoons olive oil and a pinch of kosher salt. Use your hands to massage the kale for 1-2 minutes, until it has collapsed to half its size and the leaves turn dark green. Don’t skip this step! You definitely want to break down the fibrous kale for maximum salad enjoyment.
Add 1 diced avocado and ¼ cup grated (or thinly peeled) parmesan cheese to the bowl with the kale.
Pour the majority of the caesar dressing over the kale and use your hands to dress the greens evenly (you may not need *all* of the dressing – start with less and you can always add more).
To serve:
Top the salad with the crispy chickpeas and ½ cup freshly grated/peeled parmesan cheese. Enjoy! A note that while the salad holds well and can be stored in the fridge and enjoyed later, the chickpeas are best enjoyed right away (for maximum crispiness).
That’s all for this week! If you enjoyed this newsletter, it means the world if you tap that “heart” button below, share this with a friend, subscribe, or leave a comment (it really helps more people find this newsletter)! Thank you so much for your support!
We love roasted chickpeas! And what I didn’t know until 6 months ago is that the fluid drained from chickpeas called aquafaba can be used as an egg substitute. We use when baking for a toddler with egg allergy but in light of the egg drama going on it might be handy (and free if you’re already opening the can). Theee tablespoons equal one whole egg, and two tablespoons equal one egg white.
Gonna try this salad especially the dressing recipe!!
Crispy chickpeas are one of my absolute favorites! I’m definitely going to be trying this salad soon.